other

August 05,2025 • 6 min read
How to Paint Bee Hives the Right Way: A Complete Beginner’s Guide

If you're just getting started with beekeeping, painting your bee hives might seem like a minor detail. But it’s actually one of the most important steps in setting up a successful, long-lasting apiary. Proper painting helps protect your hives from weather, pests, and rot—while also making your bee yard easier to manage.
In this beginner-friendly guide, we’ll walk you through everything from choosing the right paint to applying it safely and correctly. And because good beekeeping is about more than just taking care of the bees—high-quality beekeeping suits and safety gear are just as important—we’ll show you how to protect yourself along the way.
Why Painting Beehives Matters
Painting beehives isn't about looks (although colorful hives do brighten up your bee yard). It’s about protection and performance.
Long-Lasting Hive Protection
Wooden hive boxes are exposed to sun, rain, and humidity—so over time, unpainted hives can crack, warp, or rot. A few coats of paint help weatherproof the surface, extending the life of your equipment and giving your bees a more stable home.
Painting also helps control temperature inside the hive. For example, lighter bee hive paint colors reflect sunlight, keeping the colony cooler in summer, while darker shades may help retain warmth in colder climates.
Choosing Safe Paint for Bee Hives
Before you grab a brush, make sure you’re using non-toxic paint for beehives. The paint you choose will affect your bees' health, especially if it hasn’t fully cured before installation.
Look for These Qualities:
-
Water-based latex paint
-
Low-VOC (volatile organic compounds)
-
Exterior-rated and weather-resistant
-
Mold- and mildew-resistant if possible
Avoid oil-based paints, stains with strong chemicals, or anything with added insecticides or fungicides. Bees are incredibly sensitive to toxins, even trace amounts.
How to Prepare a Beehive for Painting
Like any paint job, surface prep makes all the difference. Whether your hive is new or previously used, here’s how to get started.
Step-by-Step Prep:
-
Sand rough or splintered surfaces for a smooth finish.
-
Wipe clean to remove sawdust, dirt, or grease.
-
Let the wood dry completely before painting—moisture will ruin the finish.
If you're painting an assembled hive, it’s best to remove or tape off any metal parts and avoid painting inside the hive where bees will live.
And don’t forget: safety matters, even during hive prep. Wear gloves, a mask, and your beekeeping safety gear if your bees are active nearby.
Painting Beehives: A Step-by-Step Guide
Now for the fun part—painting!
Best Practices for Painting Beehives:
-
Apply one coat of primer (optional, but helpful).
-
Use two coats of your chosen safe, exterior paint.
-
Paint only the outside of hive boxes, lids, and bottoms—never paint the interior.
-
Let each coat dry thoroughly before applying the next.
Try to do your painting on a dry, mild day. Paint adheres best when temperatures are between 10°C and 30°C (50°F–86°F). And remember—fully painted and cured hives will last much longer in all weather conditions.
When to Paint Your Beehives
Timing is Everything
The best time to paint your hives is before you install bees. This gives the paint time to cure fully, reducing any off-gassing or lingering odors that could disturb the colony.
If you’re repainting older boxes or touching up an existing hive, make sure it’s during a time when bees are calm or not present. Use smoke lightly and always wear high-quality beekeeping suits to stay protected, especially when handling components that may still have bees inside.
How Weather Affects Painted Hives
Weather plays a big role in how your painted hive holds up over time.
Weatherproofing Beehives
In rainy or humid areas, choose paints with mildew resistance and reapply every few seasons to maintain the seal. In sunny, hot climates, stick with lighter bee hive paint colors to reduce overheating.
Your beekeeping tools and equipment should also be stored in a dry, shaded area to avoid rust or wear—and always clean your brushes and gear after painting.
Maintaining Your Painted Hive
Inspect and Touch Up
Every season, inspect your hives for:
-
Peeling or cracking paint
-
Exposed or discolored wood
-
Signs of water damage or mold
A quick touch-up coat now can prevent a major repair later. Combine this task with regular hive checks, and wear your beekeeping safety gear just in case your bees are more active than expected.
Protecting Yourself While Painting and Inspecting
Painting your hives might not seem risky—but if bees are present, it's always smart to take precautions.
Beekeeping Gears Matter
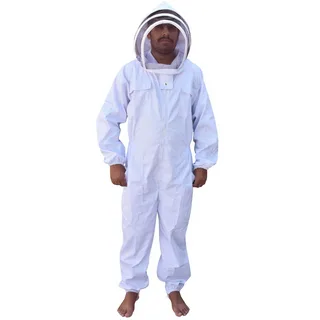
Suit up with high-quality beekeeping suits that are breathable, sting-resistant, and comfortable. Whether you’re doing a quick touch-up or lifting boxes to paint underneath, good gear gives you the confidence to work calmly and safely.
Look for ventilated bee suits in warmer months and full-coverage designs if you’re doing repairs or repainting during active bee season.
Conclusion:
Painting your bee hives is one of the easiest ways to extend their lifespan and keep your bees healthy. From selecting safe paint for bee hives to mastering application techniques, every step you take adds protection and polish to your apiary.
And don’t forget—beekeeping gears like brushes, gloves, and high-quality beekeeping suits play a big role in how safe and smooth the job goes. So take the time to prep well, paint carefully, and protect yourself throughout the process.
A well-painted hive doesn’t just look good—it works better, lasts longer, and makes your bees feel right at home
Sam Jhons Details
User Profile
- Full name
- Sam Jhons
- Email address
- samjhons19@gmail.com
- Join Date
- 2025-08-05
- State
- City
- Pincode
- Address
- Follow us on Facebook
- Follow us on Twitter
- Website Name
- Bio